

When an applicant workflow completes, add a Google Sheets row, post to Slack, then update the row status
When a Sumsub applicant workflow completes, a new Google Sheets row records the applicant, Slack gets a message for your team, and the same row is then updated with a status you set.
 Sumsub
 Google Sheets
 Slack
4 steps Setup ~8 min Used on 341 sites Free to import
What this workflow does
Compliance teams need two things after each verification: a record they can audit and a quick heads-up to whoever acts on the result. Doing that by hand from the Sumsub dashboard is slow. This workflow logs each completed applicant workflow and tells your team, then marks the record.
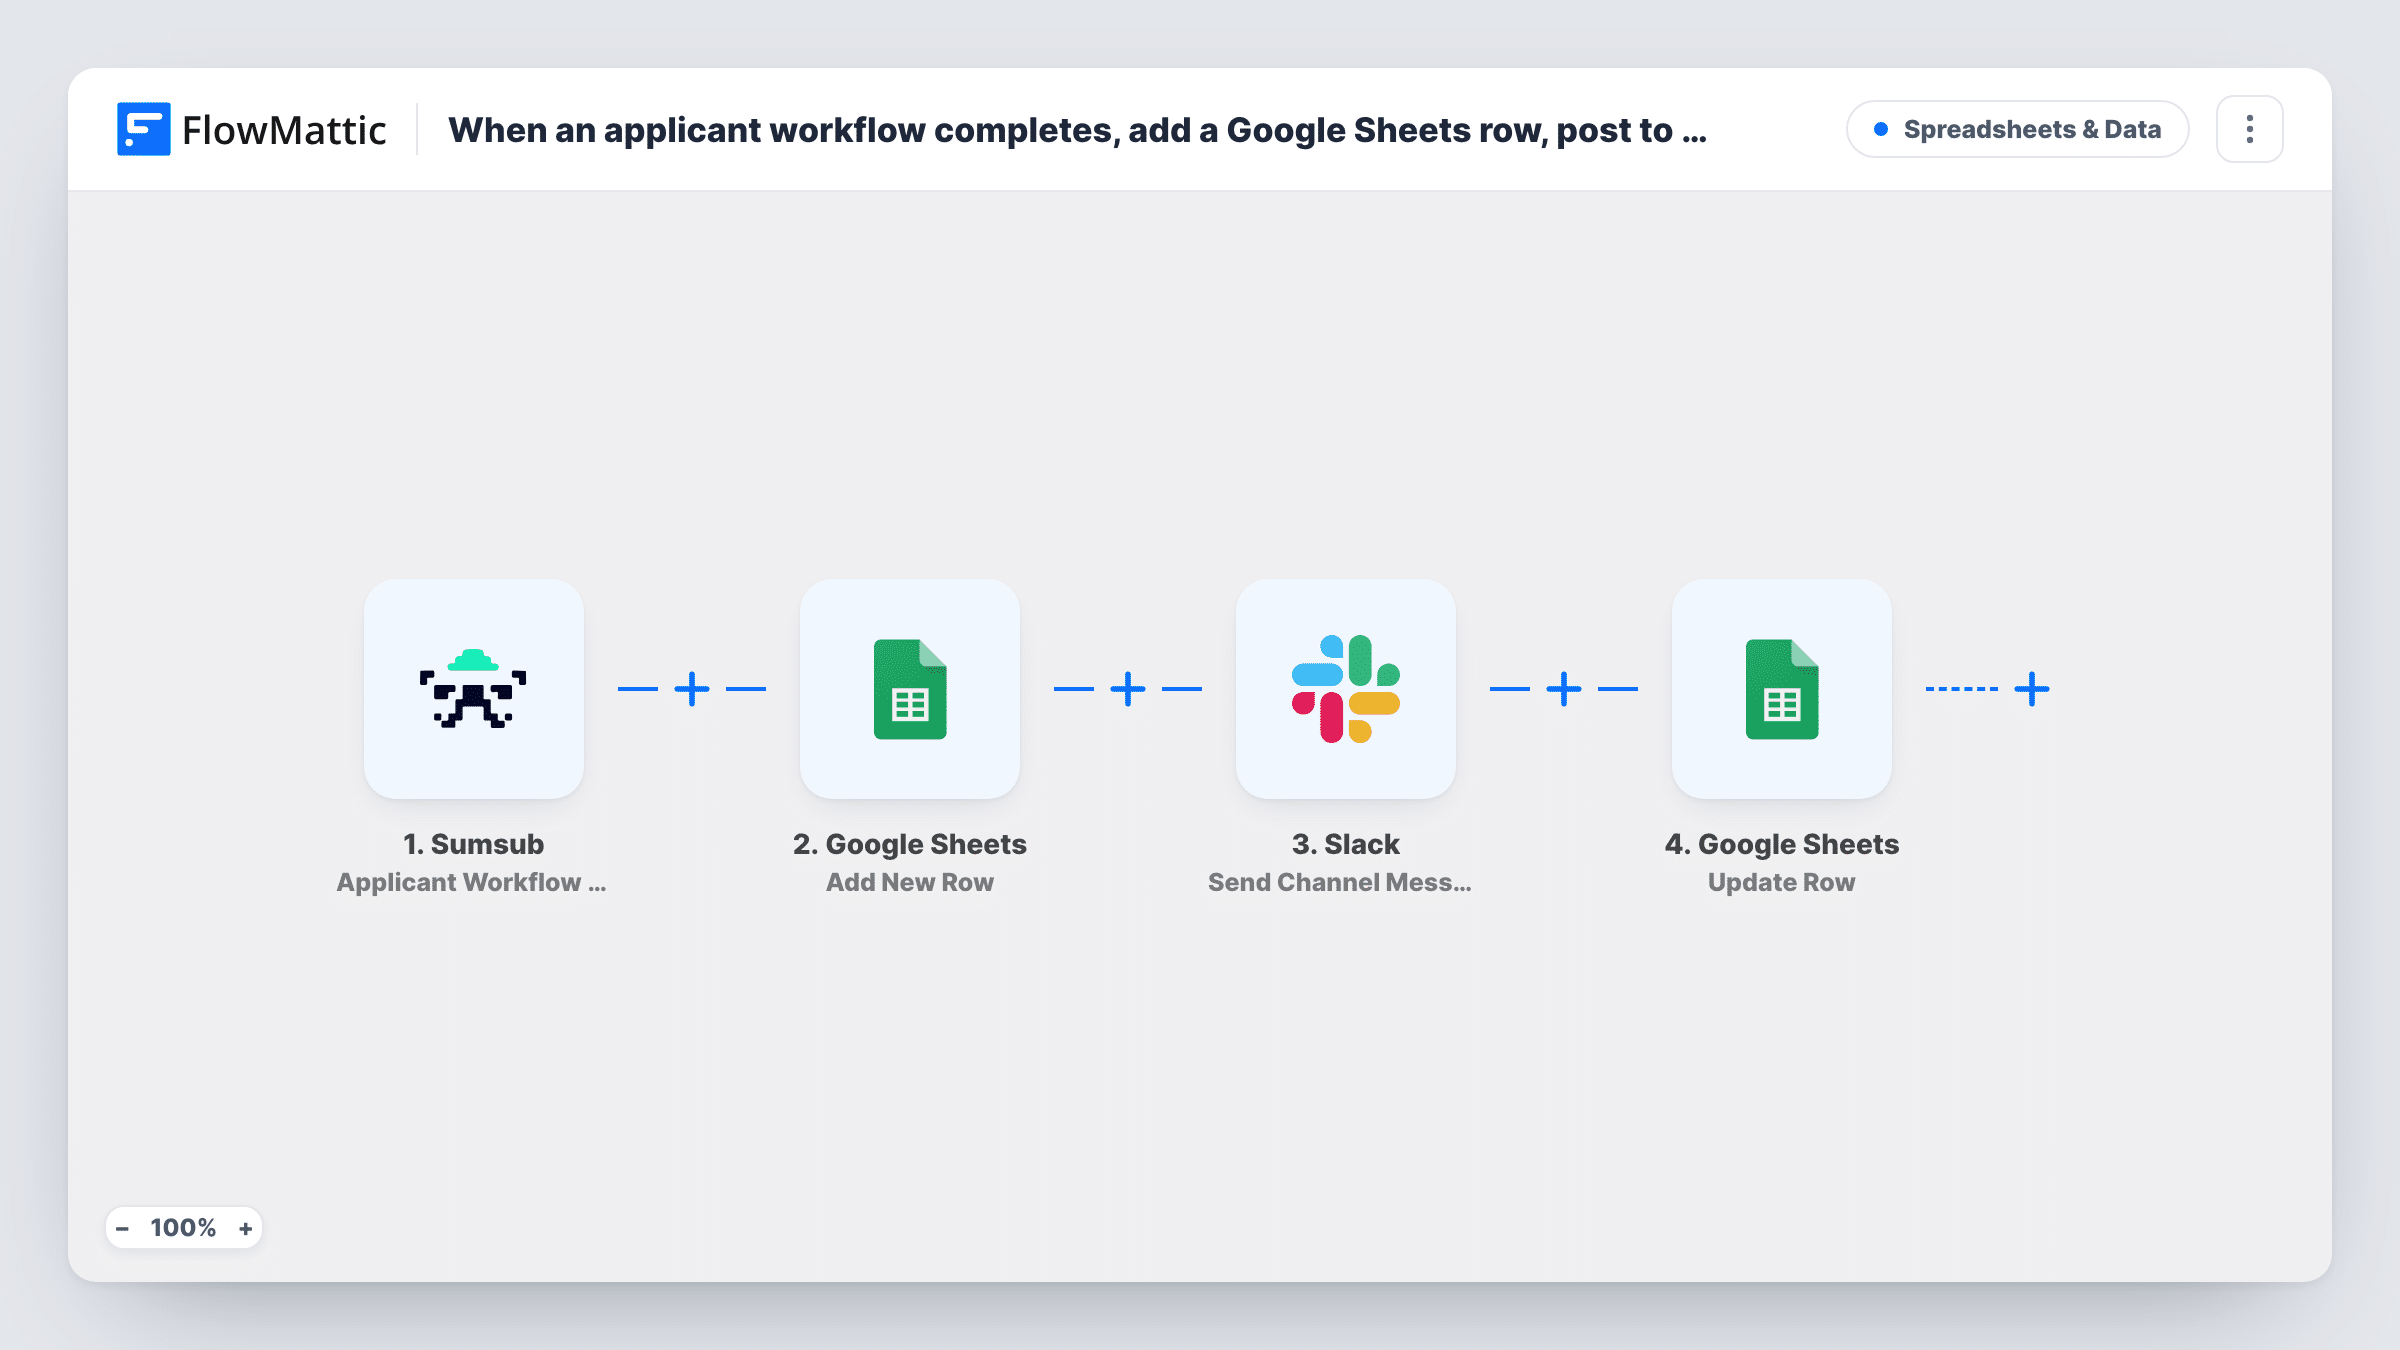
The Sumsub trigger runs on Applicant Workflow Completed and passes the applicant data to FlowMattic. First, Add New Row writes a row to Google Sheets with the values you map, such as the applicant ID and the result. Next, Slack receives a channel message about the applicant.
The last step, Update Row, changes an existing row in your spreadsheet, for example a status column set to Notified. It has to know which row to change, so map the reference returned by the Add New Row step and confirm it with a test run. Task History shows what each step returned, so open it when a status in the sheet looks wrong.
KYC log for a fintech team
Every completed Sumsub check adds a row to a shared sheet, and the compliance channel in Slack sees the applicant as soon as the row exists.
Onboarding marketplace sellers
Sellers who finish verification are logged in Google Sheets, and the onboarding team gets a Slack message to continue the seller's setup.
Audit trail with a status column
The final update writes a status into the row, so anyone reviewing the sheet later can see which applicants were passed to the team.
How this workflow runs
What happens at each step once the workflow is on, and what you need before you import it.
 Sumsub Applicant Workflow Completed
Runs when an applicant workflow completes in Sumsub. The applicant data is passed on for the sheet, the Slack message and the row update.
- Google Sheets Add New Row
Adds a row to the Google Sheets spreadsheet you choose with the Sumsub data you map. Set up the sheet's columns first, including one for the status the last step fills in.
- Slack Send Channel Message
Posts a message about the completed applicant to your chosen Slack channel. Write the text with mapped values, such as the applicant ID and result, for the team to act on.
- Google Sheets Update Row
Updates an existing row in the spreadsheet with the values you map, such as a status. Point it at the row created in step two, using what that step returns, and check the result with a test.
What you need
- FlowMatticCore
- Sumsub AccountAccount
- Google Sheets AccountAccount
- Slack AccountAccount
After importing, map your own data. To keep the template universal, not every step is pre-filled. Open each step in the builder and connect your accounts and fields (channels, lists, sheets, recipients) before you switch the workflow on.
Make it yours
Changes worth making after you import it.
- If the Sumsub data carries the review result, add a Router between Add New Row and the Slack step, with one exactly-matches route per result and its own Slack message. End the routes in a Join before Update Row.
- Put the same applicant identifier in the Slack message and in the sheet row, so a teammate reading the message can find the matching row.
- Restrict sharing on the Google Sheet to the people who need it, since it holds applicant verification data.
Questions about this workflow
Why does the Sumsub workflow update the row it just added?
So the record carries a status written after the Slack message step. You decide the value, for example Notified, and the column it goes in.
Which row does the Update Row step change for a Sumsub applicant?
The row you point it at. Add New Row returns the number of the row it just added, so map that row number into Update Row and the status lands on the same applicant's row. Confirm it with a test run.
Do I need a Google Sheet ready for Sumsub applicants?
Yes. Create the spreadsheet with column headers for the applicant data and the status before you map the two Google Sheets steps.
More Spreadsheets & Data workflows
Other ready-to-import templates from the same category.





Import this workflow into your WordPress site
Download the JSON, import it from the Workflows screen and connect your accounts. Every run stays on your server, with no per-task fees.
30-day money-back guarantee Unlimited workflows and runs Self-hosted