

Assign appointments to different agents with round-robin scheduling on new Stripe payments
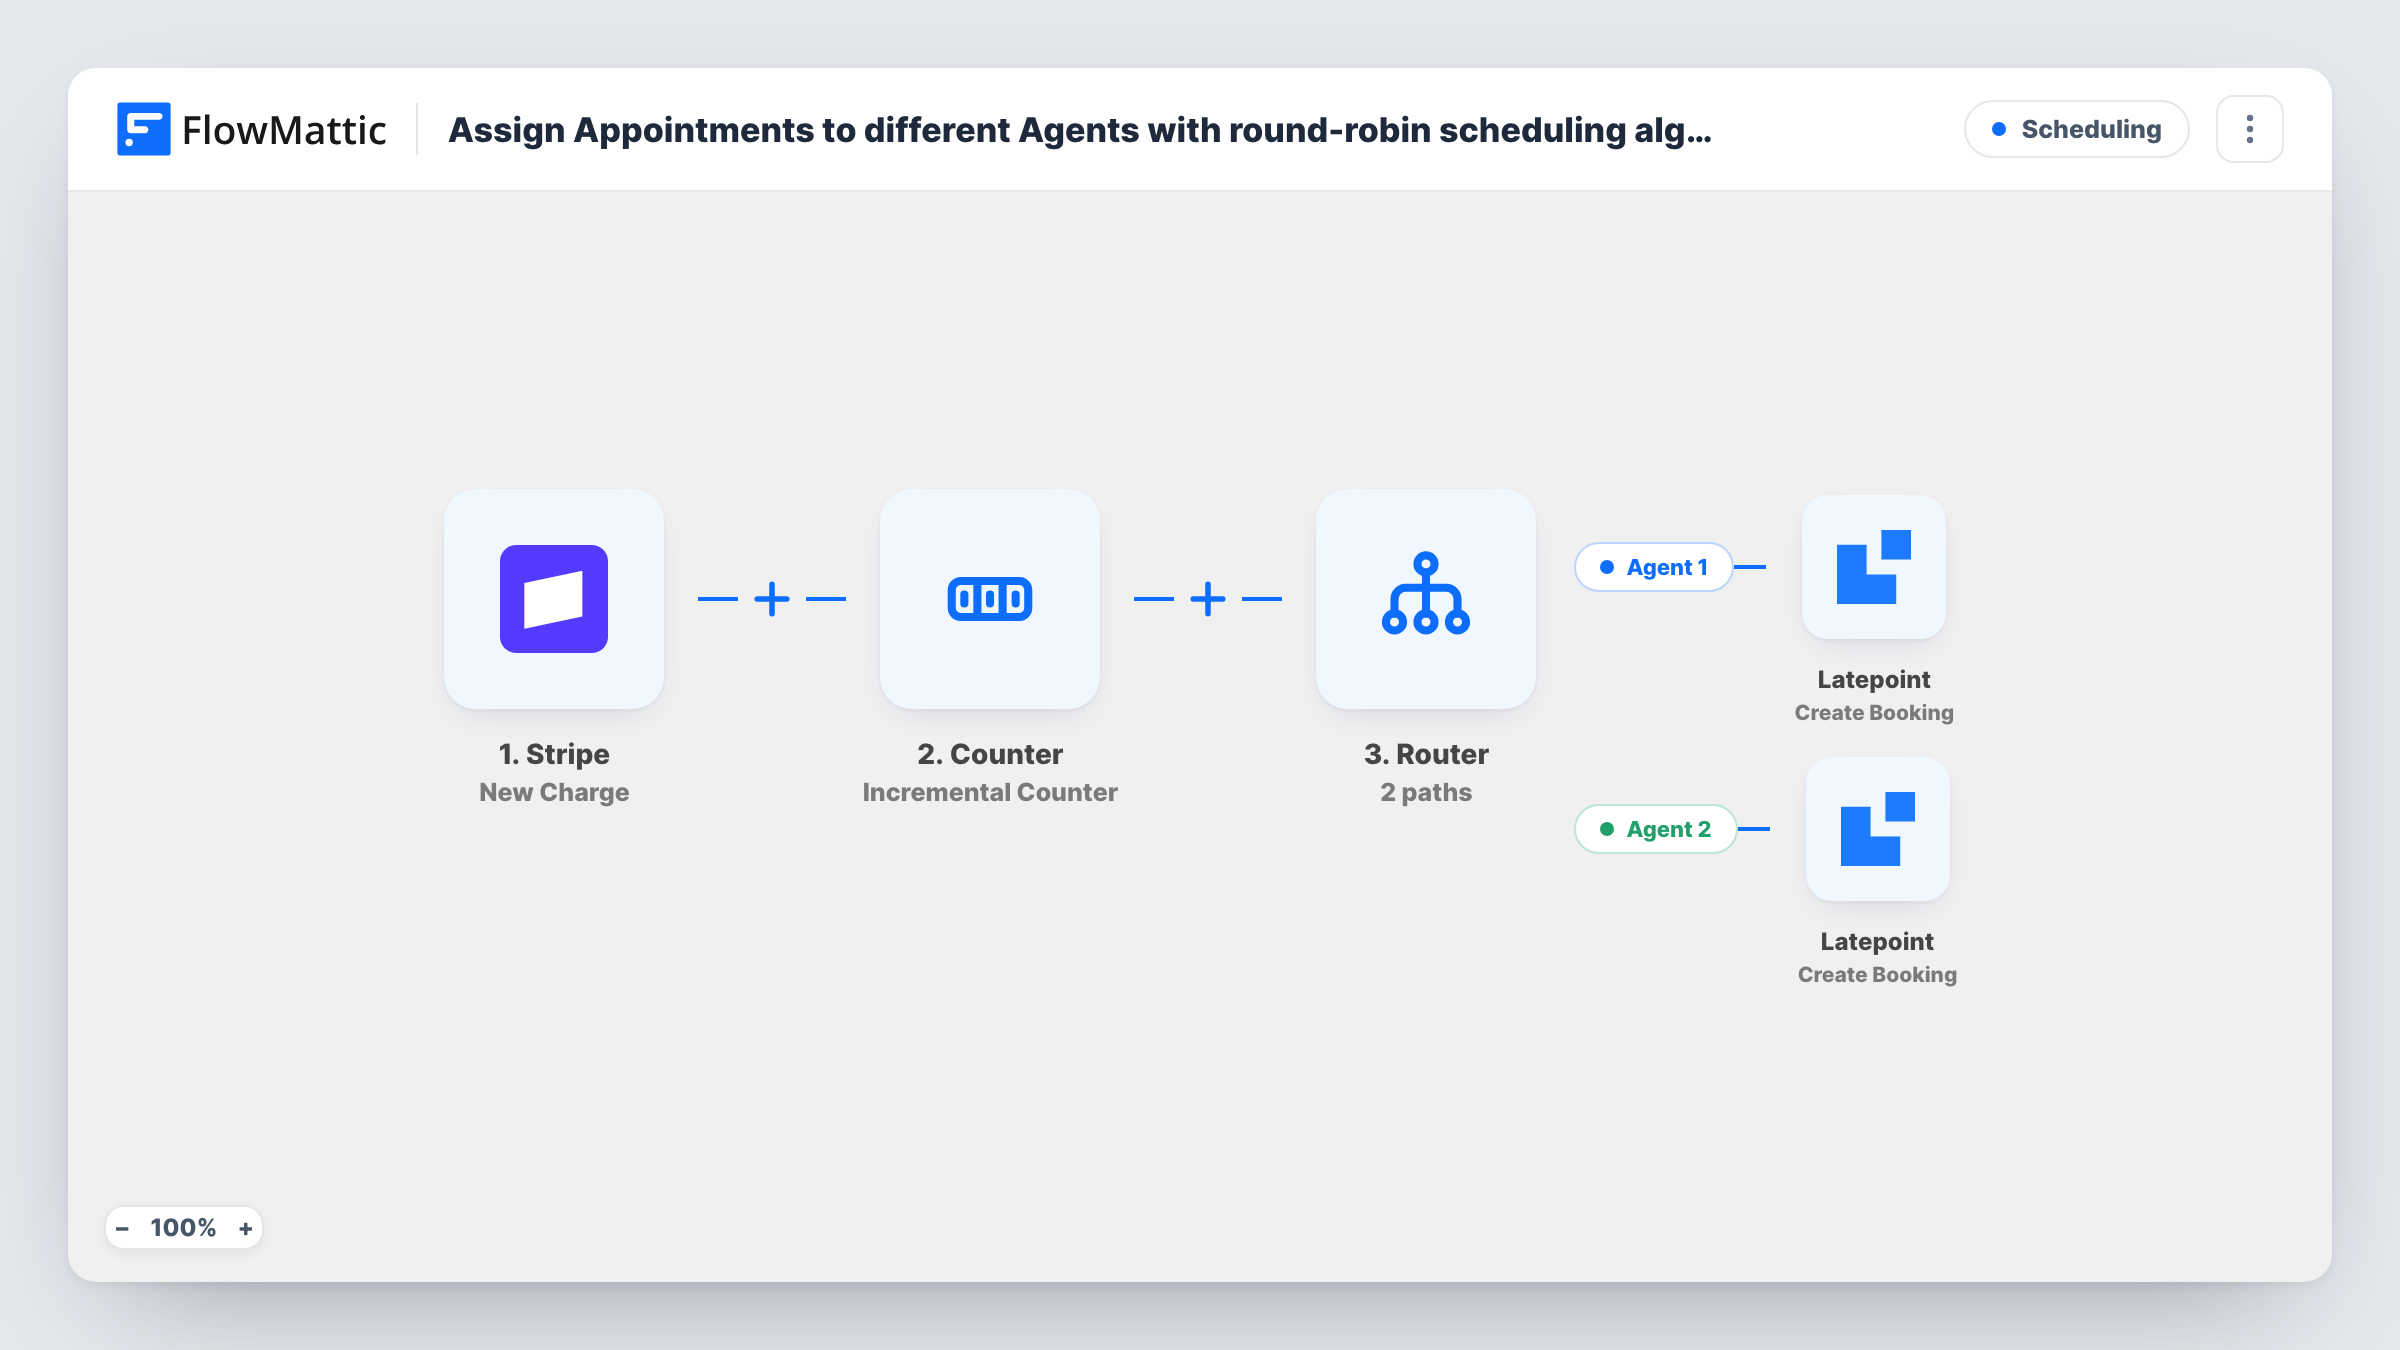
After each successful Stripe charge, a FlowMattic Counter alternates between 2 and 1, and a Router creates the LatePoint booking for Agent 1 or Agent 2 in turn, sharing paid appointments evenly.
 Stripe
 Counter
 Router
 Latepoint
5 steps Setup ~8 min Used on 1.5k sites Free to import
What this workflow does
When customers pay up front for a session, someone still has to decide which team member takes it. Assigning by hand tends to favour whoever is online. This workflow takes turns instead: each paid charge in Stripe creates a booking in LatePoint, alternating between two agents.
Each run begins with a successful payment in Stripe, through the New Charge trigger. FlowMattic's Counter then updates a number stored for this workflow. It is set to start at 1, add 1, and reset once it reaches 2, so the values run 2, 1, 2, 1. That means the very first payment goes to Agent 2, the next to Agent 1, and so on.
A Router with two routes reads the counter. The Agent 1 route continues when the value is exactly 1 and the Agent 2 route when it is exactly 2, so each charge runs one route only. Each route ends in its own LatePoint Create Booking step, which ships unmapped: pick the agent for that route and map the customer details from the charge.
A Stripe charge is a payment record, so details such as the service or time slot have to come from the charge's metadata, if your checkout adds it, or be set in the booking steps. Make a test payment and check Task History to see what Stripe sent and which route ran.
Two consultants sharing paid calls
A tax advisory firm sells paid consultations through Stripe and lets the two advisers take alternate bookings in LatePoint.
Fitness coaching packages
A gym's online checkout for personal training splits each new paid package between two trainers so neither gets all the new clients.
Support sessions after purchase
A software seller books a paid onboarding session for every Stripe charge and spreads them across its two onboarding specialists.
How this workflow runs
What happens at each step once the workflow is on, and what you need before you import it.
 Stripe New Charge
Starts a run for every successful Stripe charge. The charge details, such as the amount, billing details and any metadata, are passed on; a test payment shows what is there.
- Counter Incremental Counter
Updates a stored number for this workflow: it starts at 1, adds 1 per run and resets once it reaches 2. The result, final_value, alternates between 2 and 1 and decides the route.
- Router 2 paths
Sends the run down one of two routes based on the counter. Agent 1 runs when final_value is exactly 1, and Agent 2 when it is exactly 2, so the two routes never both run for one charge.
- Latepoint Create Booking
On the Agent 1 route, creates a new booking in LatePoint. The step ships unmapped: choose Agent 1 and map the customer and booking details you have from the Stripe charge.
- Latepoint Create Booking
On the Agent 2 route, creates a new booking in LatePoint. Set it up like the Agent 1 step, but choose your second agent so bookings alternate between them.
What you need
- FlowMatticCore
- Stripe AccountAccount
- LatePoint PluginPlugin
After importing, map your own data. To keep the template universal, not every step is pre-filled. Open each step in the builder and connect your accounts and fields (channels, lists, sheets, recipients) before you switch the workflow on.
Make it yours
Changes worth making after you import it.
- Add Stripe metadata such as the service or preferred date at checkout, so you can map it into the LatePoint booking steps instead of fixed values.
- For three agents, change the Counter's reset value to 3, add a third Router route that continues when final_value is exactly 3, and give it its own Create Booking step.
- If some Stripe charges aren't for appointments, put a Filter between the New Charge trigger and the Counter step on the charge description or metadata, so other payments don't take a turn.
Questions about this workflow
Which agent gets the first Stripe payment?
Agent 2. The Counter starts at 1 and adds 1 on the first run, so final_value is 2. It then resets to 1 on the next run and keeps alternating.
Can both LatePoint bookings be created for the same Stripe charge?
No. The routes check for exactly 1 and exactly 2, and the Counter returns only one of those values per run, so only one route's booking step runs.
Does the counter keep its place between Stripe payments?
Yes. FlowMattic stores the Counter's number for this workflow and reads it on each run, so the turn passes to the other agent on the next charge.
Does every successful Stripe charge create a LatePoint booking?
Yes, as imported. Any successful charge starts a run. Add a Filter between the trigger and the Counter if only some products should book an appointment.
More Scheduling workflows
Other ready-to-import templates from the same category.





Import this workflow into your WordPress site
Download the JSON, import it from the Workflows screen and connect your accounts. Every run stays on your server, with no per-task fees.
30-day money-back guarantee Unlimited workflows and runs Self-hosted